Posts

Showing posts from 2014

Repair Dolce Gusto Circolo Leaking Problem
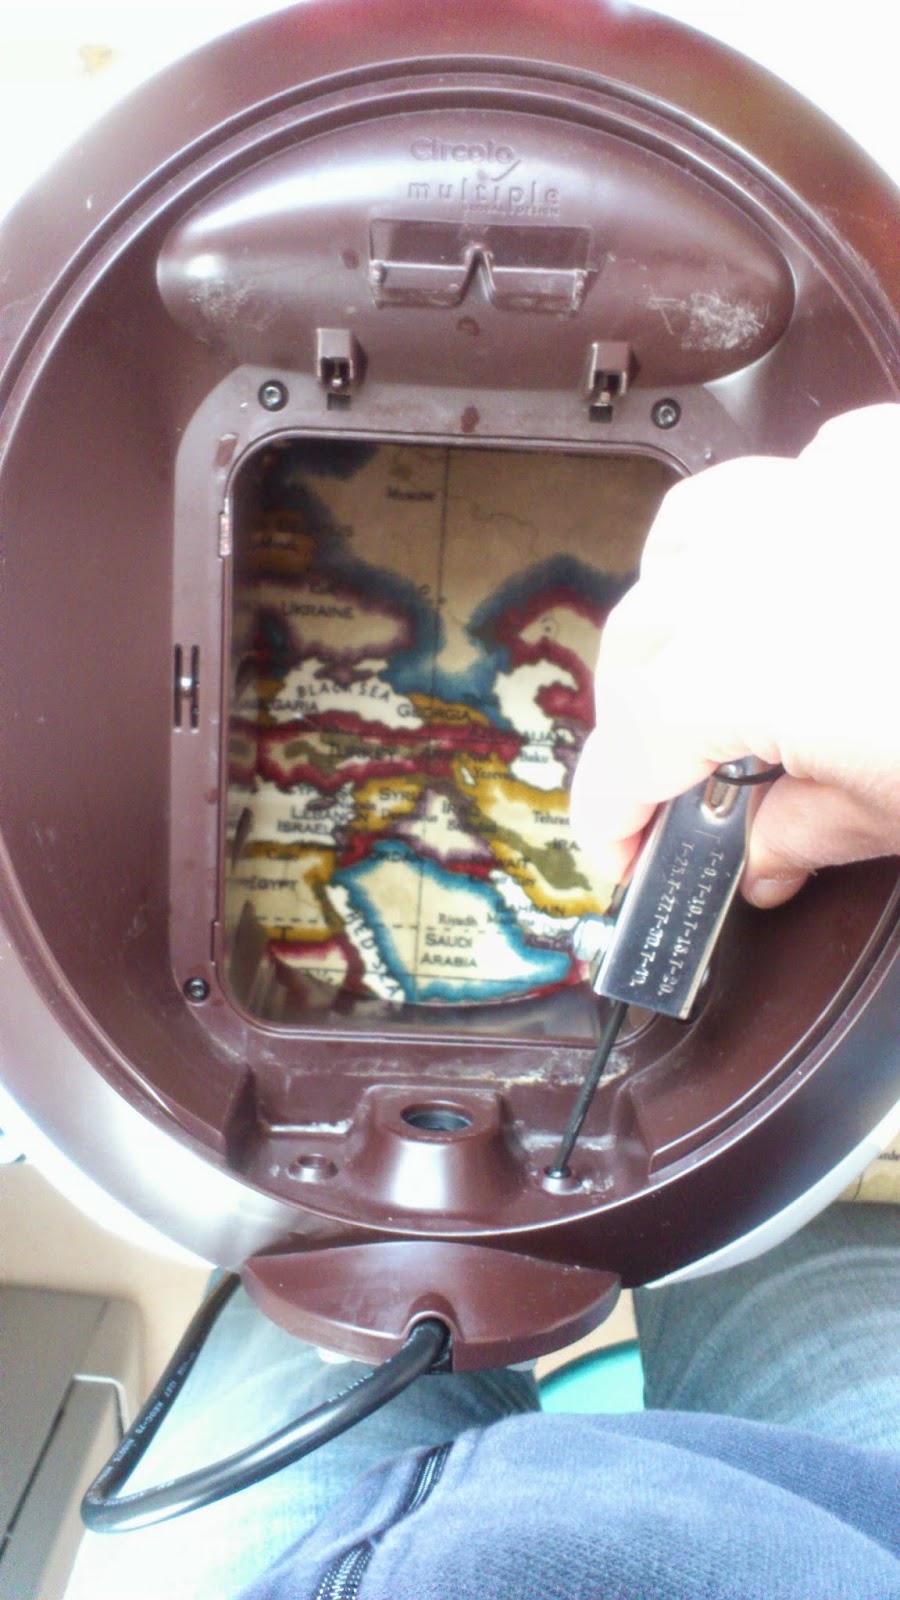
Image
My Dolce Gusto coffee machine started leaking without even plugin in to the socket. Water was leaking at the base, the tank would get completely empty in a few seconds, so I dismounted the back cover to see. Use a Torx tool.  Fisrt start removing the two screws down besides the reservoir connector. Down there you see the join inside the water connector. That small rubber joint was apparently in a good shape but the problem really came from it. I took the small water filter and descaled it by diping it in white vinegar for a few minutes. Then I took a rubber tap joint from my tool box and put it on top of the rubber joint as you see it in the circle. Then I mounted all back again and it works! The joint was just too used, and you can replace it with a tap rubber joint, just find the right size. Descale the coffe machine This is always a good thing to do every two or three months to keep the inside clean. I descaled completely by filling the water tank with a mixture

Repair TV LG Plasma Screen no Power

Image
This is a fix for the LG TV Plasma model 3500 and it will work for many other TV models. The screen tooks longer to turn on until it went completely off. I tried the hair drier trick that worked every now and then but it was getting worse anyway and it needed a fix. When the TV screen does not turn on it is 90% because of a power supply board problem. It may be the capacitors, or not. I took the cover off and there you can see the supply board on the left hooked to the main board. When I examined closely the supply board the capacitors were all right, so I turned the board around and repaired all the bad welds, there were seven or eight that looked bad. I really had a hard time with my soldering iron as it took about 5 minutes to heat every spot, I think it may be a faulty one but it did the job anyway and we can enjoy our TV back. This TV costed about 500 euros 4 years ago and to repair it today it has only costd me a few drops of soldering tin. And patience :) I am glad it

Samsung EVO SSD 250gb on MacBook Pro late 2008

Image
The fantastic thing about SSD (Solid State Drive) drives is that there are no mechanical part in it, thay have layers of flash memory inside, so there is no magnetic friction or anythyng as in HDDs. They consume less power making your battery last longer. And, best of all it can really boost your laptop. This time the upgrade will need an spacer as the Samsung Evo SSD is only about 7mm thick against the 9mm HDD. The material you need to install the SSD drive The Phillips 00 Screwdriver and a Torx T6 Screwdriver and the plastic tool to lift up the keyboard gently. You will have to unscrew all those tiny screws on the four sides around the MacBook and the four long ones you see besides the ram memory slot.  There are also two more screws inside the battery place. And here it's time to lift up the upper case with the keyboard in it. Do not force anything, if you see that it doesn't come up easy, check if there still some more screws. Once it comes up you will see t

Dismount HP Pavilion dm1 Keyboard

Image
Instructions to clean or replace the HP Pavilion dm1 Keyboard Remove the main back cover and then unscrew the five screws with the keyboard symbol as seen in this picture: Lift the top part of the keyboard with a small screwdriver. Look for the leaning points and do it very gently. Then pull from the top of the keyboard towards the screen. Lift the keyboard a little bit only and you will see that it is pluged to the main board. Unplug the keyboard from the main board by lifting up the black top holder piece. It does not come by pulling but the holder piece under the yellow tape in the main board should be lifted first. There it is. As you can see this one was very dirty inside but after a good cleaning and brushing everywhere, specially the fan, everything worked fine!

Vim: Word Wrap and Disable Automatic New Line

Image
Vim has many features and you can configure in the way you want to make the most of it. To wrap lines you need to change your vimrc file and also to disable the automatic new line behavior. When you are typing text Vim will automatically insert a new line after the 80 column. This is not convenient and it's very annoying if you use Vim to write besides programming as I do. Another nice feature is to have a left margin so text is not right next to the window border. Here's my vimrc file: " Word wrapping and disable new line automatically set wrap set linebreak set nolist  " list disables linebreak set textwidth=0 set wrapmargin=0 set formatoptions-=tc " Margin between text and window's border set foldcolumn=3 And here's how the text looks like with the new configuration: I really like Vim and I use it on Mac, Unix and Windows because it's a very light weight editor and you can make Vim a full writing tool like WriteRoom , or al ful